



Setup in Eclipse
Import the project
- Install a 64-bit JDK 22 or later and Eclipse IDE for Java Developers.
- Download or clone the repository.
- In Eclipse, select File > Import > General > Existing Projects into Workspace.
- Choose the repository directory and finish the import.
- If Eclipse does not recognize the project automatically, create a Java project using the repository directory as its location and add the existing
srcfolder as a source folder.
Configure Java
- Open Window > Preferences > Java > Installed JREs.
- Add and select the JDK 22 installation.
- Open the project properties and set Java Compiler > Compiler compliance level to 22 or the installed compatible level.
- Make sure the project uses the Java module path when Eclipse asks whether a dependency belongs on the classpath or module path. Right click on project click on Build Path > Configure Build Path > Java Build Path > Library
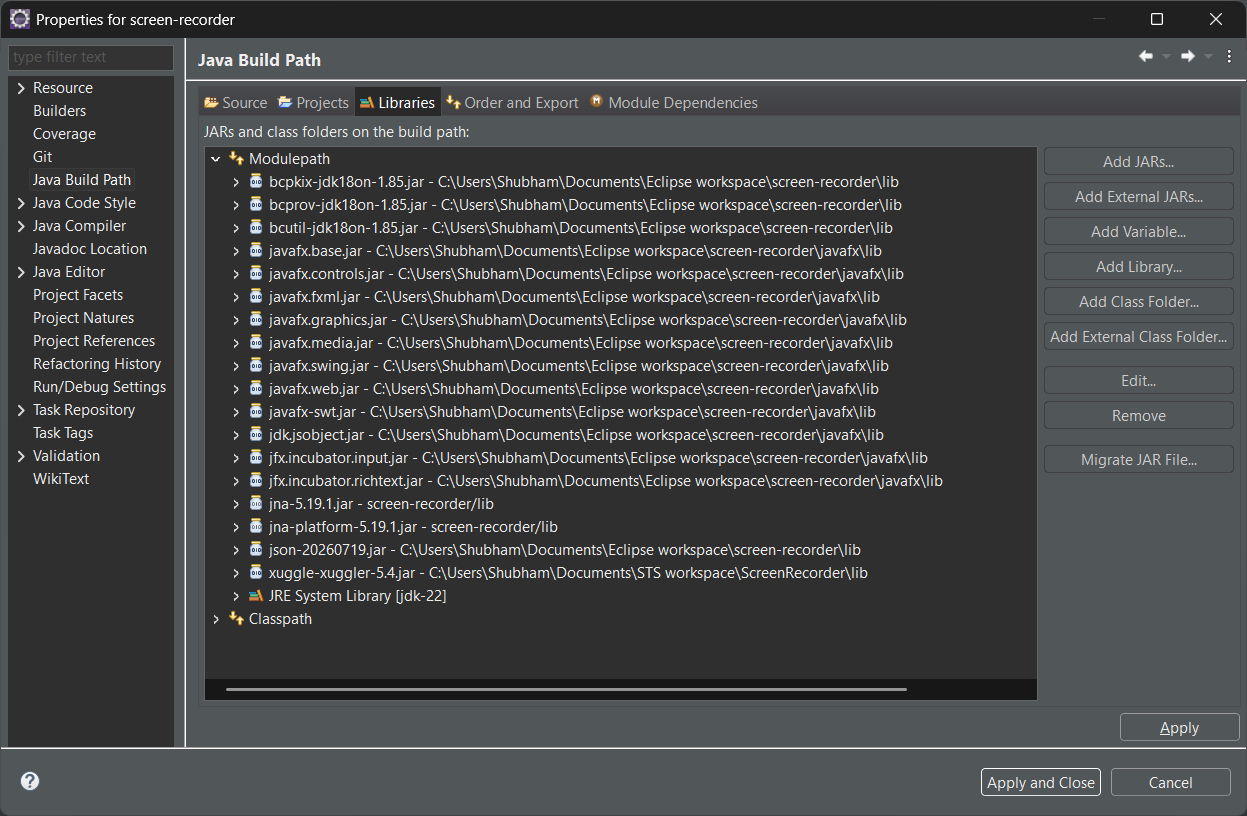
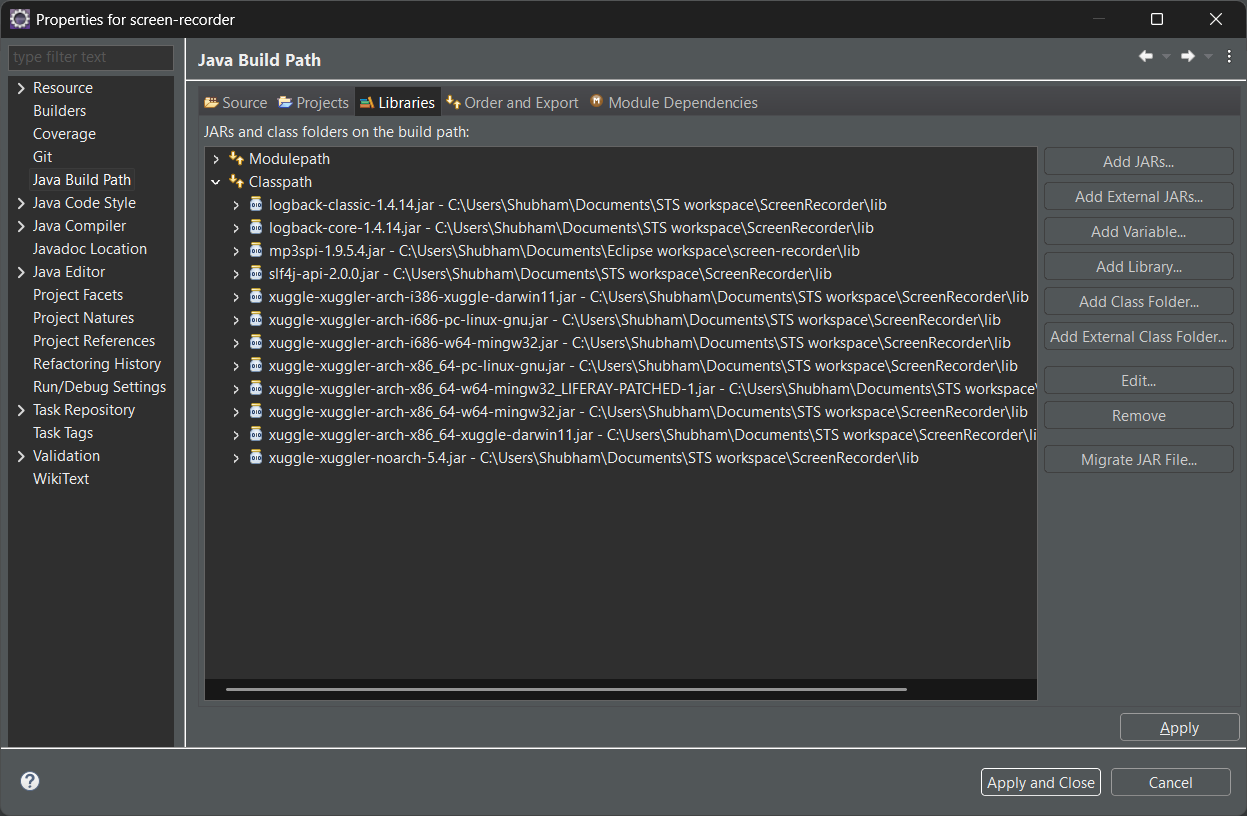
Add libraries
Add JavaFX, JNA, Xuggler/Xuggle, and their native dependencies as described in Dependencies. Add JavaFX modules required by the code, including the Swing integration and media modules.
If the project contains a module-info.java, make sure the required modules are available to the module path and that native libraries are discoverable by the JVM. Check Eclipse's Problems view after refreshing the project.
Run the application
- Open
src/com/oranbyte/screenrec/Main.java. - Right-click the file and select Run As > Java Application.
- Grant Windows microphone access if microphone capture is needed.
- If notifications are enabled, verify that
lib/snoretoast.exeis present.
The main window should open after JavaFX is initialized. For the first capture, see Introduction and the usage pages.
Was this helpful?
Supported
You feedback has been received!
Thank you for your help.